Thursday, May 9, 2013

Stansbury Island

Stansbury Island is situated at the southern end of the Great Salt Lake approximately 28 miles west of Salt Lake City as the crow flies.  It was named for Howard Stansbury, who led a government expedition to survey the area during the mid-nineteenth century.  Depending on the level of the Great Salt Lake, it can be a true island connected by an earthen causeway, or merely a peninsula jutting up from the south shoreline.  Near the center of the island is its highest point, which is low by Wasatch Mountain standards, yet it rises over 2,400 feet above the present-day lake level.  Stansbury Island is not a popular place to visit – mainly due to accessibility, remoteness, and the fact that there are no real forested areas.  It does, however, provide a great place to hike and mountain bike during the early spring and late autumn months when the higher elevations of the Wasatch are covered in snow.  While most of the interior of the island is public land under BLM (Bureau of Land Management) jurisdiction, some of the perimeter is privately owned by mineral extracting companies and ranchers.  The trick, therefore, comes in hiking and biking in this area without infringing too much on private property.  Since there are no clean water sources on the island, it will be necessary to bring plenty of drinking water along with sunscreen and some insect repellent.
To reach Stansbury Island coming from the east, take the second Grantsville exit (Exit 84) along I-80 and continue straight onto the dirt road, or the first Grantsville exit if coming from the west – turning right (north) under the freeway overpasses to reach the dirt road.  Follow the good-conditioned dirt road approximately 3.9 miles over two railroad tracks (each with a stop sign) and along the causeway to reach a wooden BLM sign on the island.  Here the road forks with the left (west) fork being the main road.  If you continue along the main road for about 3.4 miles past the BLM sign, a fence line (with a cattle guard) is reached that marks private property.  While public access is allowed along the road beyond this point, you cannot (should not) leave the main road.  This fence line provides, perhaps, the best starting point for reaching the island's high point without any noticeable trespassing.  A good place to park can be found by turning right (east) onto an unimproved road just before the cattle guard and following the fence line to an area just north of a small butte.
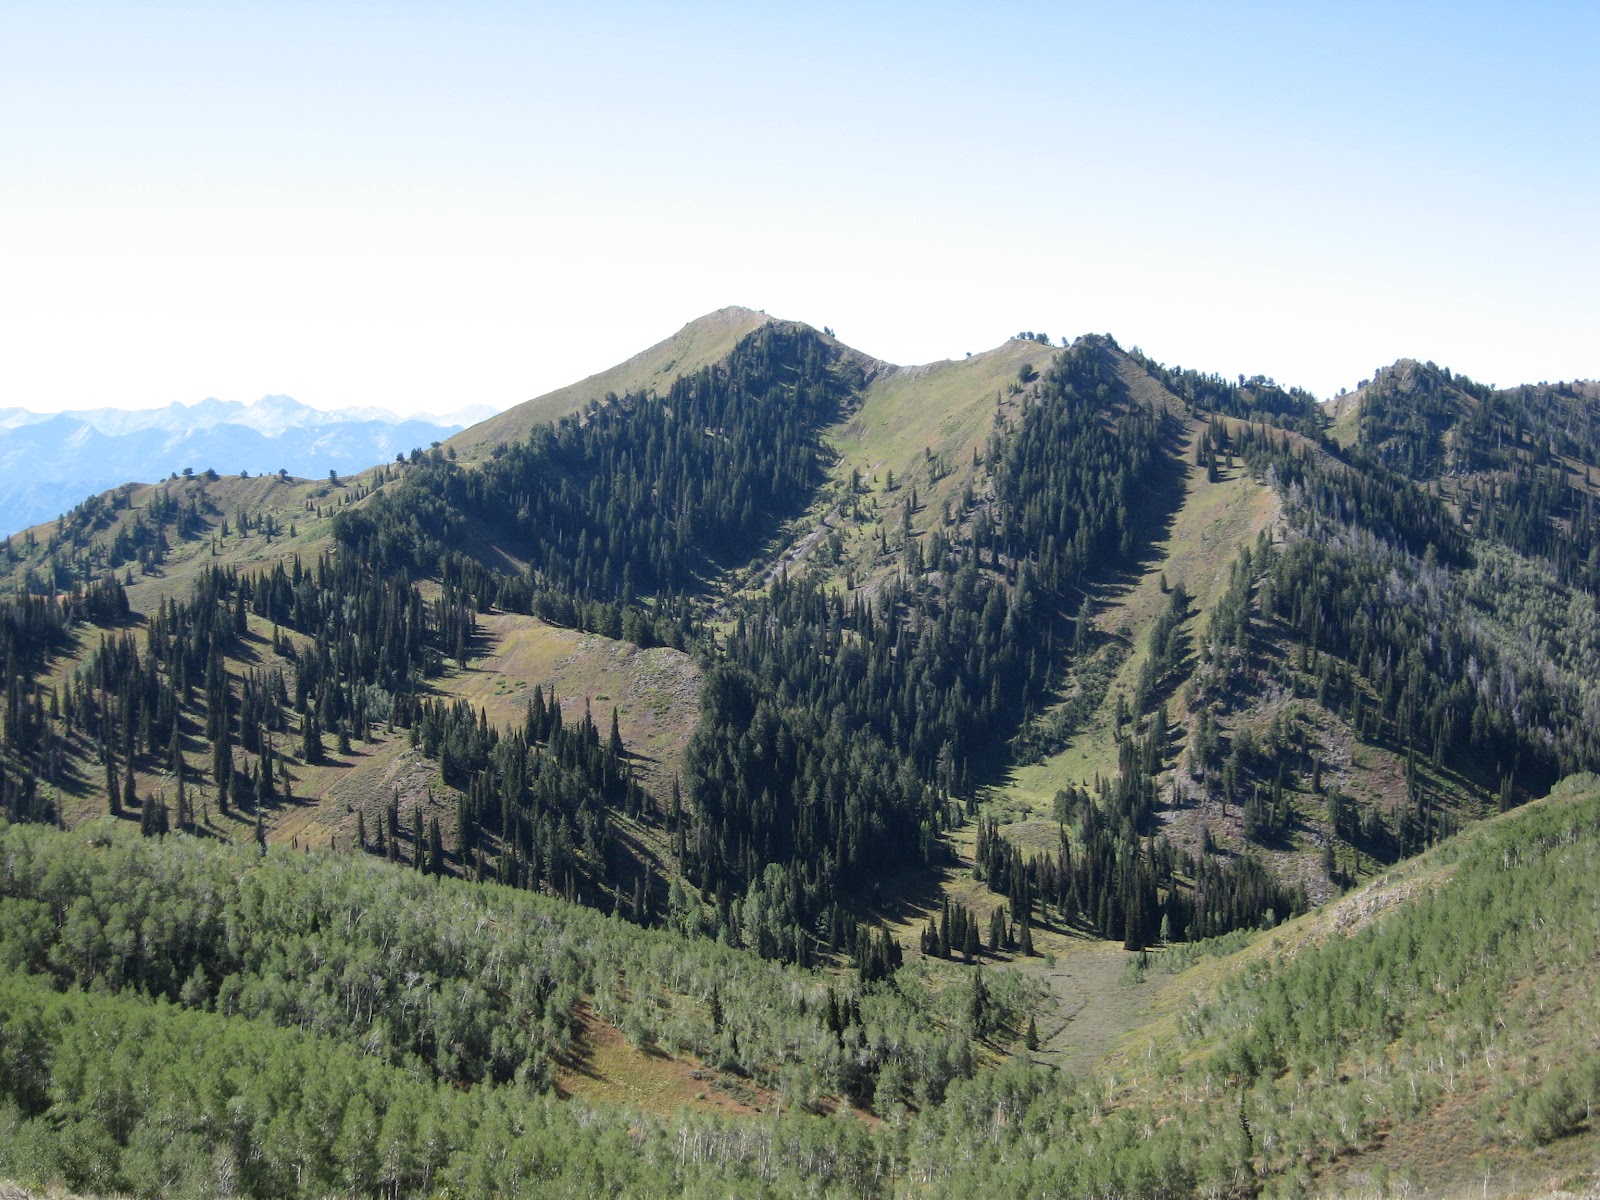
The Stansbury Island high point (middle
hump) taken along the Provo Bench not
far from the starting point
The route begins by following the fence line on foot as far to the east as possible.  It may be necessary to cross the fence briefly in a flat terraced area to gain access to an upper terraced area at approximately 4,900 feet elevation.  This is one of the levels of the ancient Lake Bonneville (known as the Provo Level) that is quite evident along the west slope of the island.  In this post I will refer to it as the Provo Bench.  Other than occasional ravines cutting through, the Provo Bench provides a level, suitable route for most of the way to the Stansbury Island high point – skirting around the privately owned property.  Approximately 2.8 miles along the route after heading west-northwest, look for a low-lying point listed as "4756" on the map.  Follow with your eyes the ridgeline north of this point as it climbs the side of the island.  This is basically the ridge you need to climb to reach the summit.  As you draw closer to this ridge, it will be to the left (north) of the rocky slope while looking up the drainage.  On some maps the summit appears to be listed as "Castle Rock," but the rock formation known as Castle Rock lies just to the south-southeast of the true summit.  Distance from the starting point to the 6,649-foot summit is approximately 4.2 miles one-way with an elevation gain of 2,369 feet.  Stansbury Island is also a place where there are various forms of Native American rock art, some of which is on private property.  To appropriately gain access to the rock art in the Broad Canyon area, please contact the Six Mile Ranch Company in nearby Grantsville for permission.
View looking south-southeast over Castle
Rock from the Stansbury Island high point
View looking northeast to Antelope Island
from the Stansbury Island high point
A Mormon Cricket, which is very
plentiful on Stansbury Island at times

Native American rock art in the Broad
Canyon area of Stansbury Island

Tuesday, March 19, 2013

Sheep Dip Mountain

Sheep Dip Mountain is a rather strange name to give a mountain, but the term actually refers to a dipping trough that farmers and shepherds use to protect their sheep from external parasite infestations.  This unusually-named mountain is located in a southern extension of the Caribou National Forest – in a "boundary hiccup" area along the Utah-Idaho border.  Based on the official description, the border between Idaho and Utah was set at the 42nd parallel of latitude.  When surveyed back in the late 1800s, however, two surveys (probably coming from opposite directions) didn't match up in the middle.  Rather than change what had already been done, it appears as though they tied into the other one's survey, creating a diamond-shaped area roughly 176 acres in size shared by both Idaho and Utah (see blue area on map).  Having trekked to all six corners of Utah, I became intrigued with this area and I wanted to see if I could locate any survey monuments.  In researching possible routes to access Sheep Dip Mountain, the Idaho side offered the easiest approach.
To reach the starting point for this hike from Salt Lake City, take I-15 north for about 95 miles to the Idaho border.  Continue into Idaho, taking off on the Woodruff-Samaria exit (Exit 3) and turn right towards the east frontage road.  Follow the frontage road back towards the south for about 1.1 miles to the streambed coming out of Burnett Canyon.  Parking is allowed near the streambed as long as vehicles are well off the road to allow farm equipment to pass by.  When I came here I had my hiking partner, Joe, and his wife come along with me.
Sheep Dip Mountain viewed from a
point to the west-northwest
View looking west over I-15 along the
Utah-Idaho border from the "6677" point


We followed a well-established trail for at least one mile up Burnett Canyon before veering to the right (south) towards Sheep Dip Mountain.  At this point we left the trail and made our way over the south ridge of Burnett Canyon into the Trail Creek drainage – staying in the sparsely vegetated areas as much as possible.  A point listed as "6677" on the USGS topographic map provides the first real vantage point, and aligns perfectly with the state boundary line to the west.  Here I spent perhaps 30 minutes looking for any evidence that might indicate a boundary since this point sits at the edge of the shared area, but I found nothing.  From this point our route continued southeastward along a more forested ridge to another point wholly within Utah listed as "6941" on the map.  While we never did come across any survey monuments and/or markings to indicate a boundary, there is most likely evidence in places we did not look.  We ended up going a different route down the mountain than we did coming up – one which I don't recommend since we had to scale several barbed wire fences and cross private property.  Based on the route we took up, distance from the starting point to the 7,057-foot summit of Sheep Dip Mountain is approximately 4.0 miles one-way with an elevation gain of approximately 2,490 feet.
A Sego Lily (Utah State flower) blooms
along the route to Sheep Dip Mountain

Wednesday, February 13, 2013

Nevado de Toluca (Dream Hike List)

I thought I would jump off the beaten path for a post and describe a hike that I haven't been on yet, but wouldn't mind attempting if I were ever in the area again.  The place I'm referring to is the Nevado de Toluca area of south-central Mexico, which is located about 80 kilometers (50 miles) west-southwest of Mexico City.  While I have been to Mexico City before, I was with a package tour then, and I didn't have the time or means to take leave for very long.  Besides, I knew practically nothing about this mountain at the time and I understand very little Spanish to this day.  So what aroused my interest in this volcanic mountain?  I became fascinated with the two lakes in its caldera, which sit at an approximate elevation of 4,200 meters (13,780 feet), and the fact that they were known ceremonial and sacrificial sites during pre-Hispanic times.  Much of the west rim of the crater also rises above 4,500 meters (14,764 feet) elevation.  This is higher than any point in the Lower 48 United States, yet low enough for not having to contend with much perpetual snow.  However considered, it would be a place where acclimatizing to the altitude is necessary for "lowlanders" to do any serious hiking.  The nearby city of Toluca (officially named Toluca de Lerdo) sits at 2,667 meters (8,750 feet) above sea level – so spending a few days there should help acclimatize to the higher altitude.  In my case, I would also take a partner with me that understands Spanish much better than I do.
Approaching Nevado de Toluca from the
northwest – Photo credit: Rob Woodall
According to Google, the directions for reaching Nevado de Toluca are as follows: From Paseo Tollocan (Highway 15) in Toluca, take Paseo Cristobal Colon southward for approximately 1.9 kilometers (1.2 miles) and then turn right (west) onto Calzada del Pacifico.  Calzada del Pacifico eventually turns into Carretera Ciudad Altamirano-Toluca (Highway 134).  Continue westward along Highway 134 for about 13.4 kilometers (8.3 miles) and then turn left (southward) onto Highway 10 to Raices at the sign indicating the park and Volcan de Nevado de Toluca.  Follow this highway approximately 7.6 kilometers (4.7 miles) through Raices and veer to the left (east) on the gravel road leading up to the volcano.  Drive along the gravel road for another 3.5 kilometers (2.2 miles) to a fork where you will again veer to the left around a hairpin turn.  This road continues to climb the mountainside above the timberline to the trailhead, which is approximately another 10.5 kilometers (6.5 miles) beyond the hairpin turn.  It used to go all the way into the crater, but it has now been closed to motor vehicles to preserve the environment.  At the trailhead are several dwellings with sleeping space that can be rented for further acclimatizing to the altitude.
From the trailhead, the pathway climbs approximately 130 meters (427 feet) in the first kilometer (0.6 mile) to reach a saddle along the crater rim, which offers a spectacular view of the surrounding rim and lakes below.  The larger lake off to the right (west) is called Lago de El Sol (Lake of the Sun) while the smaller lake slightly to the left (south) is Lago de La Luna (Lake of the Moon).  A large lava dome separates the two lakes, and rises about 130 meters above Lake of the Sun.  Past the saddle, the trail descends approximately 90 meters (295 feet) to a point near the Lake of the Moon shoreline and then continues around the lava dome to a hut-like structure near the Lake of the Sun shoreline.  Along the southwest rim is the highest point of Nevado de Toluca, which is Pico del Fraile (Friar's Peak) at approximately 4,660 meters (15,288 feet) elevation.  Reaching the summit is most commonly achieved by ascending up the east ridge from the main trail – where some scrambling over rock is involved under dry conditions.  November through March provides the best time to hike Nevado de Toluca as this is the dry season in the area.  Keep in mind that temperatures in the crater are cold year-round, and that frost and snow can occur during any month.  Along with warm clothing, hikers to this area will often bring crampons and an ice axe as a precaution.
The trailhead area of Nevado de Toluca –
Photo credit: Stefan Kontradowitz
View of structure and Lake of the Sun
from the southeast side – Photo credit:
Jomillsjo via Wikipedia

Monday, December 24, 2012

South Willow Lake

One of the prettiest gems in the Stansbury Mountains is South Willow Lake.  Tucked away in an unnamed glacial cirque, this alpine lake is flanked by the rock faces of North and South Willow Peaks (not official names).  From a hiking perspective, South Willow Lake can only be seen from its shoreline, or from the surrounding viewpoints.  It provides a great retreat to a secluded spot for a picnic lunch, camping, fishing, or to simply get away from it all.

There are two main routes to access South Willow Lake.  A more direct, yet steeper route begins at the Medina Flat Trailhead of South Willow Canyon, which is just above the Boy Scout Campground to the north of the main road.  This route crosses a ridge into the Mining Fork of South Willow Canyon – where the drainage is basically followed up to the lake.  The route that I took however begins at the Loop Campground in South Willow Canyon along with other hikes in this mountain range.  To reach the trailhead where I started, follow the same directions listed in the previous post on North and South Willow Peaks.
View of the approach to South Willow
Lake below the unnamed cirque
The trail begins near the restrooms at the top of the Loop Campground and enters the Deseret Peak Wilderness Area several hundred feet beyond the information sign.  Once the trail crosses the streambed and splits at approximately 0.7 miles, take the right fork towards the Pockets Fork of South Willow Canyon.  Deseret Peak comes into view when the Dry Lake Fork streambed is crossed after another 0.6 miles, and the view basically remains unobstructed until the crest of the ridge is reached before Pockets Fork.  At approximately 1.4 miles beyond the first trail split, the trail splits again in the Pockets Fork drainage – where you will continue straight (northward) towards South Willow Lake.  From this point the trail terraces the mountainside around a second ridge and then drops into the Mining Fork drainage.  After crossing the Mining Fork streambed, the trail splits a third time where the left fork is taken (westward) for the final half-mile climb to the lake.  This stretch is the steepest part of the hike, which ascends about 460 feet to reach the 9,140-foot elevation of South Willow Lake.  Distance from the trailhead to South Willow Lake is approximately 3.6 miles one-way with an elevation gain of about 2,000 feet (taking into account a 460-foot gain after a 260-foot loss).
South Willow Lake as viewed
near the north shoreline
South Willow Lake as viewed
near the southeast extension

Monday, October 29, 2012

North & South Willow Peaks

North and South Willow Peaks are not official names as published on the USGS topographic maps of the Deseret Peak vicinity, yet they are known as such by many of the local residents.  Some years ago, I submitted these names to the U.S. Board on Geographic Names in an attempt to have these points in the Stansbury Range officially identified.  Since they are located in a congressionally designated wilderness area, however, my request was rejected by the Forest Service.  Their reasoning was to "minimize the human impact on the wilderness cultural layer."  With a limited understanding of wilderness law, I was disappointed at this ruling.  Nonetheless, North and South Willow Peaks offer spectacular hiking in an area that is seldom visited for the more-popular Deseret Peak area to the south.  As a result, there is no established trail along the summit ridge beyond the Pockets Fork Trail to these two summits.  Only 350 to 500 feet lower than the summit of Deseret Peak, a visit to North and South Willow Peaks will reward you with great views of the surrounding landscape.
To reach the trailhead for North and South Willow Peaks, take the Tooele City exit (Exit 99) off of I-80 onto SR 36 if coming from the east, or the Grantsville exit (Exit 84) off of I-80 onto SR 138 if coming from the west.  Once off the freeway on the Tooele exit, continue on SR 36 for about 3.0 miles and turn right (west) onto SR 138 towards Grantsville.  Follow SR 138 (approximately 11.0 miles) through downtown Grantsville and turn left (south) onto West Street near the west edge of town.  From the Grantsville exit, follow SR 138 for approximately 9.0 miles and turn right (south) onto West Street near the beginning of town just after the highway curves left (east).  Head south for about 5.2 miles on West Street, which turns into Mormon Trail, and then turn right (westward) onto the road leading to South Willow Canyon.  This road is paved to the forest boundary (approximately 3.3 miles) and turns to a maintained dirt road the remaining distance to the Loop Campground.  Check with the Forest Service for road conditions around the Upper and Lower Narrow areas during seasons of heavy runoff.
View of North Willow Peak from
the summit of South Willow Peak
View of South Willow and Deseret Peaks
from the summit of North Willow Peak


The trail begins at the top of the Loop Campground near the restrooms and enters the Deseret Peak Wilderness Area several hundred feet beyond the information sign.  At approximately 0.7 miles, the trail crosses the streambed and splits – where you will fork to the right towards the Pockets Fork of South Willow Canyon.  About 0.6 miles after the trail split, the Dry Lake Fork streambed is crossed where there is a great view of the northeast face of Deseret Peak.  This view basically remains unobstructed until the crest of the ridge is reached before Pockets Fork.  After approximately 1.4 miles beyond the first split, the trail splits again – where you will fork to the left up the Pockets Fork drainage to the summit ridge.  Once on the summit ridge, make your way to the right (north) up the ridgeline along what appears to be a main trail, but soon turns into a series of game trails further up.  I tend to stay on the west slope of the ridge where there is less exposure.  About 0.35 miles along the summit ridge is a knoll, which is bypassed to reach the true summit of South Willow Peak at 10,685 feet elevation.  To reach North Willow Peak, continue northward along the ridgeline for about another 0.8 miles to the point at 10,521 feet elevation.  This involves a drop of 450 feet in elevation and a regain of about 300 feet to reach this point.  During the time I did it, I came across a rattlesnake just before I reached the North Willow Peak summit – perhaps the highest elevation I have ever observed a rattlesnake.  Enjoy your stay, but be sure to allow plenty of time to return to the Pockets Fork Trail and back down since tedious route-finding and bushwhacking may be necessary, especially from the north summit.  Distance from the trailhead to the summit of South Willow Peak is approximately 3.3 miles one-way with an elevation gain of 3,267 feet.  North Willow Peak is approximately 4.1 miles one-way with an elevation gain of about 3.567 feet (taking into account a 300-foot regain after a 450-foot loss).

Wednesday, September 19, 2012

Deseret Peak

Deseret Peak is perhaps my favorite hike to an 11,000-foot peak.  Situated approximately 45 miles southwest of Salt Lake City (as the crow flies), Deseret Peak sees fewer hikers than the more popular peaks of the Wasatch Range.  In 1984, over 25,000 acres of land in the Stansbury Mountains were designated as the Deseret Peak Wilderness Area by the U.S. Congress.  Its unique beauty is beyond anything you would normally expect to see in Tooele (pronounced "too-ill-uh") County.  While guide books often describe the remains of an old heliograph station at the summit, further research since this posting reveals that it was actually a U.S. Coast & Geodetic station used in the early surveying of the Western United States (refer to first comment below).  The old rock walls can provide some shelter from the wind on breezy days.  No specialized equipment is needed to climb Deseret Peak during snow-free conditions.
To reach the trailhead for Deseret Peak from I-80, take the Tooele City exit (Exit 99) onto SR 36 if coming from the east, or the Grantsville exit (Exit 84) onto SR 138 if coming from the west.  Once off the freeway on the Tooele exit, follow SR 36 for about 3.0 miles and turn right (west) onto SR 138 towards Grantsville.  Follow SR 138 (approximately 11.0 miles) through downtown Grantsville and turn left (south) onto West Street near the west edge of town.  From the Grantsville exit, follow SR 138 for approximately 9.0 miles and turn right (south) onto West Street near the beginning of town just after the highway curves left (east).  Head south for about 5.2 miles on West Street, which turns into Mormon Trail, and then turn right (westward) onto the road leading to South Willow Canyon.  This road is paved to the forest boundary (approximately 3.3 miles) and turns to a maintained dirt road the remaining distance to the Loop Campground.  Two unique features in South Willow Canyon are the Upper and Lower Narrow areas, which often attract rock climbers.  During seasons with heavy runoff, the road has sometimes been washed out in these areas from high water – so check with the Forest Service and plan accordingly.
View of Deseret Peak taken from
the east viewpoint area (see map)
The trail begins near the restrooms at the top of the Loop Campground and enters the wilderness area after several hundred feet or so.  Since horses are allowed on the trail, watch out for the occasional "surprises" left behind.  At approximately 0.7 miles, the trail crosses the streambed and splits; the left trail ascends up the Mill Fork of South Willow Canyon while the right trail ascends over a ridge into the Pockets Fork of South Willow Canyon.  If you're planning to hike the entire loop, it matters not really which direction you take to reach Deseret Peak.  The shortest route, however, and the one I normally take is the Mill Fork route, which continues for another 2.2 miles past the junction point to a saddle along the summit ridge.  Upon reaching the end of the canyon, the trail becomes steeper and several switchbacks are encountered before reaching the saddle at just over 10,000 feet elevation.  On the saddle with time permitting, a brief hike (perhaps two thirds of a mile over and back) can be taken on relatively level ground to a viewpoint off to the east where great views of Deseret Peak and points east can be had.  Continuing on to Deseret Peak, the main trail forks to the right (west) up a steep slope, and then veers to the south.  Snow can sometimes remain in this area well into the summer months – so plan accordingly.  Once the south shoulder of the summit ridge is reached, the trail veers westward again and climbs near the top of two north-facing couloirs, or steep gullies in the mountainside.  From this point only a short climb remains to the 11,031-foot summit of Deseret Peak.  Distance from the trailhead to the summit of Deseret Peak is approximately 3.7 miles one-way via the Mill Fork route, or approximately 4.3 miles one-way via the Pockets Fork route.  Elevation gain to the summit is 3,613 feet from the trailhead.
A rock face looms ahead near
the summit of Deseret Peak
Snow at the top of the twin couloirs
near the summit of Deseret Peak


Boy Scouts pose at an old survey
station at the summit of Deseret Peak

Friday, September 7, 2012

Grandview Peak

Grandview Peak is not a popular climb among the peaks of the Wasatch Range, mainly due to its remoteness and difficulty in accessing.  In the upper reaches of City Creek Canyon along the east slope of Grandview Peak's southern ridge, there is evidence of a massive rock slide that some scientists believe was triggered by an earthquake.  Other than this, there are no particular characteristics that make this mountain stand out from the other, more popular peaks, yet it sits as the highest point in Salt Lake County north of Parleys Canyon.  The hike described here involves mostly ridgeline hiking along part of the Great Western Trail, which technically extends from Canada to Mexico.  Since most of the trail is unshaded from the sun, it is important to use sunscreen and to bring plenty of liquids (at least one gallon) with you as there are no real sources of drinking water along the route.
To reach the starting point for this hike from Bountiful, take the 400 North (Exit 317) off of I-15 if coming from the south, or the 500 West (Exit 317) off of I-15 if coming from the north.  Turn east (towards the mountains) onto 400 North and stay in the right lane to continue past Main Street.  At the stop sign, turn left (north) onto 1300 East, and then right onto 600 North up the hillside.  Take another right onto Skyline Drive and follow it nearly a half-mile to Eagle Ridge Drive.  Now turn right onto Eagle Ridge Drive and follow it to the large parking lot near the end of the street.  For those who feel confident in taking their vehicles on dirt roads, take the paved road (which turns to dirt after several hundred yards) to the left of the parking lot immediately below the huge "B" for Bountiful.  Follow this road (also known as Skyline Drive) all the way up the mountainside to the saddle along the Davis-Morgan County line.  At approximately 8.3 miles from the parking lot, continue straight on the road past the fork to the left (west).  Just beyond the fork, the road makes a hairpin turn towards the south past another parking area.  While this section of road becomes less maintained than the previous stretch, you should be able to drive carefully on it for about 3.4 miles (past the gas pipeline crossing) to a parking point along the north edge of a wooded area.  The road actually continues about another 0.9 miles further to a trailhead, but this last stretch is quite rugged for vehicles.
Grandview Peak as viewed along
the Sessions Mountain ridgeline
Survey monument cap at the
summit of Grandview Peak


Hiking along the unimproved road now, the route descends approximately 250 feet elevation into a small basin before ascending slightly to a knoll on the other side.  It then descends again to reach the trailhead at approximately 8,260 feet elevation.  The trail continues its way through mostly wooded country to reach the summit ridge of Sessions Mountain at approximately 9,000 feet elevation.  From this ridge, Grandview Peak comes into view one-and-a-half miles to the south-southeast.  As the trail heads generally east from this point, it drops about 400 feet to a saddle and then regains this same elevation on the other side.  The entire route along the East Sessions Mountain ridge (about 1.1 miles) is unshaded from the sun.  At a point near where three counties meet, the final leg of the route involves another drop of about 250 feet before the final ascent to the 9,410-foot summit of Grandview Peak is made.  While the initial elevation gain from the starting point to the summit of Grandview Peak is only 930 feet, several decreases and regains in elevation push this value to approximately 2,000 feet.  Total distance is approximately 5.0 miles one-way.
View looking southwest towards
the summit of Grandview Peak